
Change the color of an icon with Gimp
Fairly often, I run across the perfect icon that I need for a website, but it’s just the wrong color. I want to keep the nice blending to the background of the icon around the edges, the shape and everything that makes the icon look spiffy. I just want the main color to be something else.
It took me a long time to figure out a good method (I’m no graphic designer!), but I eventually came a cross a really easy method that works well using trusty Gimp. I’ll walk you through it.
1. Find an Icon
The first step, of course, is to find an icon. There are billions of free ones out there on the web. This is mine.
![]()
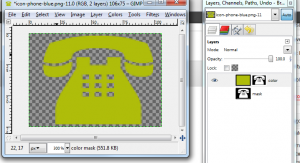
I love it. It’s just what I need–but what a terrible color! I need something else. It’s a PNG and when I open it in Gimp, here’s what it looks like.
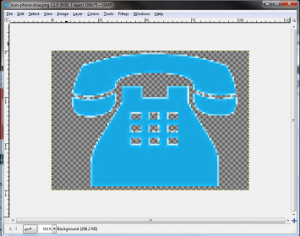
You can see the edges have been blended into a white background which would work great if I only ever put it on a white background. Well, I just might be doing that, but I’m too much of a perfectionist to use it like that. So, let’s get to work.
2. Create a color layer
Add a new layer to the image by selecting Layer > New Layer. Call it “color”. Make sure it’s on top of the “Background” layer.
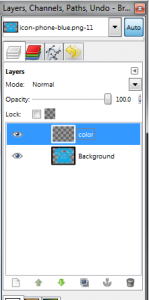
Fill this new layer with the color you want to change the icon to. I’m using this lovely puke color (not my choice!): #afbd0a.
Now, hide this new layer so we can work on the “Background” layer by clicking on the eye button just to the left of the layer thumbnail.
3. Manipulate the icon colors
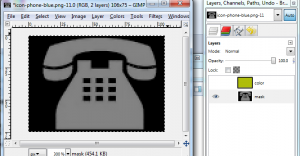
Select the “Background” layer. Desaturate the image by selecting Colors > Desaturate. I choose “Lightness” from the dialog box that pops up.
Now, invert the image by selecting Colors > Invert. Next, create another layer called “mask” and fill it with black. Move this layer below the “Background” layer. Your layers should look like the image below.

Right-click on the “Background” layer and select “Merge down”. Now you should have something similar to the image below.
4. Adjust the curves
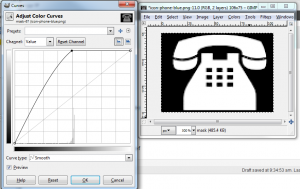
Now, with the “mask” layer selected, select Colors > Curves. In the dialog, drag the very middle of the line straight up to the top-center of the graph. Gimp should look like the screenshot below. Click “OK”.
5. Create a layer mask on the “color” layer
Now, with the “mask” layer selected, copy the entire layer by selecting Select > All. Then select Edit > Copy.
Next, right-click on the “color” layer and select “Add layer mask”. Choose “Black (full transparency)” and make sure “Invert mask” is checked.
Paste what you’ve copied to the layer mask by selecting Edit > Paste. You’ll notice a new layer called “Floating selection (Pasted layer)”. Right-click on this new layer and select “Anchor layer”. The pasted layer will now be merged with your anchor layer.
6. You’re done!
Now hide your “mask” layer and show your “color” layer. Perfect!
You now have a new icon with a completely different color, but with the nice blending at the edges and perfect shape of the original icon. Don’t believe me? Well, test it! Select your “mask” layer and delete everything on it. Fill it with any background color you want and see how it looks. Make sure to show your “mask” layer again by click on the eye button.
Hope this was helpful! You can apply your layer mask on the “color” layer if you want. But, I like to keep it as it is and save the file as an xcf for later use. This way, if you ever need the icon in another color, all you have to do is change the fill color of the “color” layer and you’re done.
Comments